

Photo by Andrew Neel on Unsplash
The Hidden Parts: Programming Design Patterns for Beginners and Professionals.
How to learn programming design patterns every developer uses in their job daily.


Programming can be hard to think about especially when one is building projects. In my experience, I had a time when I didn't know how to bring the fundamentals together to build reasonable projects and I was so confused.
If you have been struggling to build projects or you just want to be more efficient in building projects, I will show you how to build projects the smart way using JavaScript.
The major thing I want you to take away from reading this article is "The essence of programming is composition" and the rest of the article will only prove the claim. Then, what is composition?
What is composition
It is the way in which components or parts of a thing are arranged to make up the thing. The keywords here are "components" and "arranged", and they basically describe what we do whenever we create a thing. What we mostly do in programming is basically arrange, represent, transform, alter or keep data.
To explain further, a laptop is not just a thing -- it is a thing that is composed of several other things such as the keyboard, mouse, RAM, ROM and many others which are also composed of transformers, diodes and many more. "Composition" makes it easy to reuse and maintain components independently.
Recently, projects such as React, Vue and Svelt have brought composition to the user interface development for the web, yet it has not been properly propagated in programming concepts, algorithms and data structure. We will address that to a small extent in this write-up.
As programming is mostly a recreation of what we already have in the real world for the computer world, it is necessary to think in composition to model the real world for the computer, especially while programming. The question now is, how do you "think in composition"? .
Thinking in composition
To think in composition as programmers, we need data and a programming language. In this tutorial, we will be using JavaScript to think in composition. Let's get started.
Data and composition
In JavaScript, we have primitive data types. They are the basic or the smallest units of data in JavaScript. That means you cannot break them into smaller units. The primitive data types are:
const name = "You are not my friend";

const price = 100

const complete = true

const salary = null

const work = undefined
You can't break any of the above into another smaller data type. Don't even try 😜. Yet we can compose them to create other data types, objects and arrays, in JavaScript. Let's start by composing an object.
What is an object?
An object is a thing (living or not living) or an idea. To represent a thing in JavaScript, you will have to use an object. The following are a list of objects in the real world: person, dog, goat, post, tweet, article, god, cup, plate, note, gate, book, chair, testimonial, table, car, star, account, user, student or a name that represents a thing.
Then let's compose an object with the primitive and other data types. Hey wait! wouldn't it be cool to compose a tweet? Yeah, let's do that.
const tweet = {
   id: 1
   user_id: 2
   text: " Tell me you're a developer without telling me you're a developer",
   images: [ ],
   date:
   retweet () {},
   like () {},
   comment () {}
}
Looking at the tweet object above, you can see that it is composed of different things including the primitive data types. And once any of the above objects is pluralized or is plural, then it will be represented will a plural version in English:
tweet(singular) => tweets (plural)
post (singular) => posts (plural)
article (singular) => articles (plural)
cart (plural)
Now, the question is if it is a plural name, how do we represent it in JavaScript? Well, we will represent it as an array as in the example below:
const tweets = [
{
   id: 1
   user_id: 2
   text: " Tell me you're a developer without telling me you're a developer",
   images: [ ],
   date:
   retweet () {},
   like () {},
   comment () {}
},
{
   id: 2
   user_id: 2
   text: " HTML is a programming language, true or false?",
   images: [ ],
   date:
   retweet () {},
   like () {},
   comment () {}
}
]
In short, the singular form is represented by an object and the plural form is represented with an array in JavaScript. Be informed that understanding objects, Set, Map and arrays are very important in JavaScript because you cannot build any reasonable projects without them.
Data Display Patterns
All data have structures and algorithms to use on them but attention is on the structures and algorithms that are not used often. Today, I will draw your attention to things we rarely pay attention to as developers despite the fact that we use them almost every day.
Most of the projects we build as developers are repetitive; if we have really paid keen attention to them, we would have realized it and I will try my best to draw your attention to them in this tutorial.
See, I want to inform you that creating tweets, posts, articles, testimonials, carousel, random quote generators, quiz applications, image galleries and many others are all about composing similar or related components.
The first thing to do, in this article, is to build all necessary components and then compose them into some of the components listed above.
Single display pattern
A single display is showing or having just an item in a component. This means you can only show an item at a time. Examples of components that use a single display are carousel, image gallery, image slider, random quote generator, testimonial slide, counting up or down, timer or any single object like tweet, article or post. Below is a demonstration of how it is done in JavaScript:
<div class="container">
    <div id="qoute"> </div>
</div>
const item = "I am a software developer"; // Or
const qouteUI = document.getElementById("qoute");
qouteUI.innerHTML = item;
Result after css is applied. Check demo or source code:
Yeah! We have displayed an item in the browser. Oh, wait! What if we have an object? How do we display it as a single display? Well, we will display it just like we have done above. You will learn how to do it soon. Keep on reading.
Multiple display pattern

Multiple displays are showing or having many items at once in a component. This means you can display several items, of similar nature or not, at a time. Components that use multiple displays are mostly array in nature. They are tweets, posts, articles, testimonials, notifications, messages, comments, products, cart and anything that contains two or more things. In any multiple displays, a loop is required.
<div class="container">
    <div id="images"> </div>
</div>
const images = [
    {path:"images/first-image.jpeg", alt: "image"},
    {path:"images/third-image.jpg", alt: "image"},
    {path:"images/second-image.jpg", alt: "image"},
    {path:"images/fouth-image.png", alt: "image"},
    {path:"images/4 cardinal points.jpg", alt: "image"}
];

//create a single display of image
const makeImageUI = image => `<img class="image" src="${image.src}" alt="${image.alt}">`

//repeate the single display to create multiple items
const makeImagesUI = images => {
    return images.map( (image) => makeImageUI(image) )
}

const imagesUI = makeImagesUI(images)
const imagesView = document.querySelector('.images')
imagesView.innerHTML = imagesUI.join(' ')
If you pay keen attention, you will realize we have created a single display of an imageUI to create multiple displays. That means, to create multiple displays, we only have to repeat the single display for different data. Examples of multiple displays are articles, notifications, messages, comments and more.
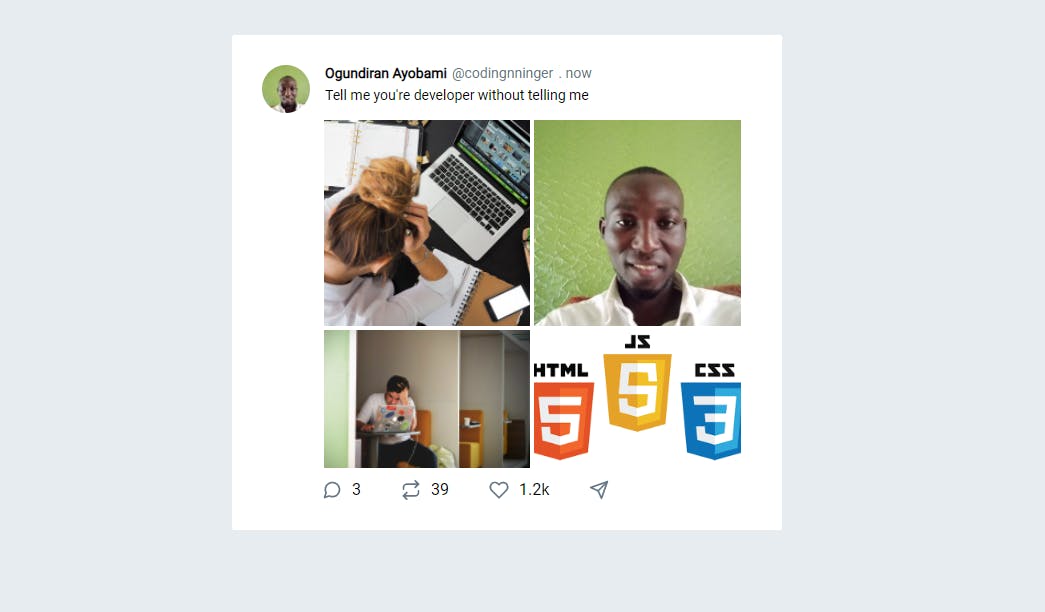
Multiple displays in a single display pattern
Sometimes, a single display contains a part of it that has to display several similar items. Twitter uses this in a tweet and that is why a tweet contains four images. A tweet is a single display and the images inside it are multiple displays. So we have multiple displays in a single display pattern. Facebook, Instagram, LinkedIn and several others use it.
<div class="container">
  <div class="tweets"></div>
</div>
 const tweet = {
        id: 1,
        user: {
          name: "Ayobami",
          id: 1,
          username: 'codingnninja',
          profile: 'images/ayobami.jpg'
        },
        text: "Tell me you're developer without telling me",
        images: [
          {path:"images/first-image.jpeg", alt: "image"},
          {path:"images/third-image.jpg", alt: "image"},
          {path:"images/second-image.jpg", alt: "image"},
          {path:"images/fouth-image.png", alt: "image"},
          {path:"images/4 cardinal points.jpg", alt: "image"},
        ],
        comment() {
          alert('commenting')
        },
        retweet() {
          alert('retweeting')
        },
        like() {
          alert('liking')
        }
     }
The object above is a representation of a tweet in JavaScript code and we are going to convert it back to a real tweet users can understand with the JavaScript code below:
// create an image single dipslay
    const makeImageUI = image => `<img class="image" src="${image.path}" alt="${image.alt}">`

// create image multiple displays by repeating the single display
    const makeImagesUI = images => {
      return images.map( (image) => makeImageUI(image) )
    }
/* All the code above are just a repetition of our previous code*/

 //create a tweet single display
    const makeTweetUI = tweet => {
      const images = makeImagesUI(tweet.images)
      return `
        <div class="tweet" id="${tweet.id}">
          <p> ${tweet.text}</p>
          <div class="images">
            ${images.join(' ')}
          </div>
          <div class="actions">
            <img src="comment.png" class="comment" onclick="tweet.comment()">
            <img src="retweet.png" class="retweet" onclick="tweet.retweet()">
            <img src="retweet.png" class="like" onclick="tweet.like()">
          </img>
        </div>
      `
    }

// Below code is what we use to connect to the browser
const tweetUI = makeTweetUI(tweet);
const tweetsView = document.querySelector('.tweets')
tweetsView.innerHTML = tweetUI;
In the code above, we declare a function makeImageUI( ) to convert an image object to its HTML equivalent. Then we declare another function makeImagesUI( ) that only repeats makeImageUI( ) HTML images using the data provided.
An HTML equivalent of the tweet object is also created with the tweet object and makeImagesUI( ) is used to create multiple displays out of the images property of the tweet object to add images to the tweet. That is composition, right? Yeah, it is. Getting used to this approach prepares you for React, Vue and Svelt. Hey, wait! What will happen when we have tweets instead of a tweet?
Our expected result after CSS is applied. Check demo or source code:
Multiple displays in multiple displays pattern
In the previous lesson about "multiple displays in a single display pattern", we only created a tweet. Now, we have to create some tweets. So, tweets are multiple displays and the images in each of the tweets are multiple displays. That means we have multiple displays in multiple displays. "Tweets array" looks like below:
 const tweets =[
     {
        id: 1,
        user: {
          name: "Ayobami",
          id: 1,
          username: 'codingnninja',
          profile: 'images/ayobami.jpg'
        },
        text: "Tell me you're developer without telling me",
        images: [
          {src:"images/first-image.jpeg", alt: "image"},
          {src:"images/third-image.jpg", alt: "image"},
          {src:"images/second-image.jpg", alt: "image"},
          {src:"images/fouth-image.png", alt: "image"},
          {src:"images/4 cardinal points.jpg", alt: "image"},
        ],
        comment() {
          alert('commenting')
        },
        retweet() {
          alert('retweeting')
        },
        like() {
          alert('liking')
        }
     },
     {...},
     {...},
 ]
The tweets array above contains three tweet objects and that means we have to repeat makeTweetUI( ) three times to model them as HTML. We use the JavaScript code below to achieve it:
// create tweet multiple displays by repeating tweet single display on data
    const makeTweetsUI = tweets => {
      return tweets.map( tweet => makeTweetUI(tweet) )
    }

    const tweetsUI = makeTweetsUI(tweets);
    const tweetsView = document.querySelector('.tweets')
    tweetsView.innerHTML = tweetsUI.join(' ');
The last three lines of the code above display the tweets in the browser. We can abstract "the last three lines" into a function like display( ). We will do that later and we are done with this part. Hurray!
Our expected result after CSS is applied. Check demo or source code:

The movements in an array
An array is an important data structure in JavaScript and without it, few or no meaningful web applications can be built. For that reason, understanding some key things about an array gives an advantage to a developer and in this article, I am going to show you some interesting things you should know about an array. Here, we will focus on some of the primitive movements and derived movements in an array.
The primitive movements in an array
These movements are the basic in an array and almost every developer knows about them but few of them pay attention to how they are repeated in most things they build every day. The primitive movements are left and right movements. This movement can only be indicated by the depth (index) of an array:
const depth = 0;
Depth could mean different things depending on the name of the array we are working with. It could be an index or a descriptive name based on an array name: imagesDepth, currentImageIndex or displayIndex or displayDepth.
0 means the first element in an array has been selected or treated. By the time the depth is 1, we moved to another item. That continues to the end of the array. Otherwise, we can move left to 0 again. That is the basic, that is, the primitive movements in an array.
left( ):
This is used to move to any item by the left of the current item. It specifies an item to jump to with an index unlike previous( ) that only moves to an immediate item by the left. It can be expressed with the code below:
const firstItem = 0;
const itemsDepth = firstItem;

const left = (decrement) => {
    if( isPositive(decrement) === true && itemsDepth < firstItem ) {
         return "Negative number is expected or you have reached the first item"
    }
   itemsDepth = itemsDepth + decrement;
 }

const isPositive = number => Math.sign(number) === 1
right( ):
This is used to move to any item by the right of the current item. It specifies an item to jump to with an index unlike next( ) which only moves to the immediate item by the right. It can be expressed with the code below:
const lastItem = items.length - 1;
const itemsDepth = firstItem;


const right = (increment) => {
    if( isPositive(increment) === false && itemsDepth < lastItem ) {
        return "Positive number is expected or you reached the last item"
    }
   itemsDepth = itemsDepth + increment;
 }

const isPositive = number => Math.sign(number) === 1
Derived movements in an array
Derived movements in an array refer to the concepts of movement that are built on the primitive movements in an array. The typical example of derived movements in an array are next, previous, up, down and more.
previous( ):
This is used to move to the item before the current item.
const firstItem = 0;
const itemsDepth = firstItem;

const previous = ( ) => {
    if(itemsDepth < firstItem) { return "You have reached the first item"}
    itemsDepth--;
 }
The code above is only meant for clarity because we could have done the same with:
const previous = (_) => left(-1);
The previous( ) method works by removing one from the itemsDepth to move back to the previous item one at a time and when it gets to the first item, the method will return an error.
next( ):
This is used to move to the item after the current item.
const lastItem = items.length - 1;
const itemsDepth = 0;

const next = ( ) => {
    if(itemsDepth < lastItem ) { return "You have reached last item"}
    imagesDepth++;
 }
The code above is only meant for clarity because we could have done the same with:
const next = (_) => right(1);
The next( ) method works by adding one to the itemsDepth to move to the next item one at a time and when the depth is greater than the last item, the method will return an error.
up( ):
There is nothing related to up movement in an array but we can simulate it. I discovered how to do it recently. We need to set a base index ( the number of items in a row displayed to users ). "Base index" is negative to create the up movement.
const up = baseIndex => {
  const decrement = itemDepth + baseIndex;
  if(decrement < 0 ){
    return;
  }
  left(baseIndex);
}
down( ):
There is nothing related to down movement in an array but we can simulate it too. Let's find a way to do it. We need to set a base index ( the number of items in a row displayed to users ). "Base index" should be positive to create the down movement. The code below shows how it is done:
const down = baseIndex => {
  const increment = baseIndex + itemDepth;
  if(increment > lastSlide ){
    return;
  }
  right(baseIndex);
}
We will make use of all of the movements in building some projects.
Let's build projects
After we have described and explained common components developers always use in their daily software development, it is time to use them in some projects. I will build some projects to give an insight on how to deal with other projects. Let's get started.
Counter
In this part, we will build a basic application that counts up and down when some buttons a clicked. We are going to use the next and previous movements to create this. You can check the demo here and source code here:
<div class="counter">
      <div class="counter-number"> 0 </div>
      <button class="count-btn" id="down"> Decrement </button>
      <button class="count-btn" id="up"> Increment </button>
</div>
The HTML code above is the structure of the application. Now, let's add JavaScript to it.
const counterView = document.querySelector(".counter-number");
const upButton = document.getElementById("up");
const downButton = document.getElementById("down");

 let counter = 0;

 const display = (counter) => {
     counterView.innerHTML = counter;
 }

 const left = (decrement) => {
    if( counter <= 0) {
        return "Number cannot be less than zero"
    }
    counter = counter + decrement;
 }

const right = (increment) => {
   counter = counter + increment;
 }

const next = (_) => right(1);
const previous = (_) => left(-1);


upButton.addEventListener('click', () => {
    next();
    display(counter);
})

downButton.addEventListener('click', () => {
    previous();
    display(counter);
})
If you pay keen attention, you will realize we don't use firstItem and lastItem for any condition in this project. We only use counter which represents countingDepth. The left( ) method has a condition to make sure the counter doesn't work with negative numbers, and the right( ) uses no condition because we don't know the last number. That is why it is a bit different from what we have in the previous explanation.
Doesn't it look like we just copied, pasted and edited the code from "the movements in an array"? Well, we only modified it.
Random Quote Generator

 <div class="container">
    <h1>Random Quote Generator</h1>
      <div class="quote">

      </div>
  </div>
We are going to use the HTML code above to create the structure of our application and then add JavaScript code as in below example:
const quoteUI = document.querySelector('.quote');
    const quotes = [
        {text: "There is no solution; everything is a compromise", author: "Ayobami"},
        {text: "There is sense in nonsense", author: "Wale"},
        {text: "Simple is the smallest unit of complex", author: "Einstein"},
        {text: "That is really amazing", author: "Tobi"},
        {text: "It is great to get things done", author: "Prosper"}
    ];

    const time = 2000;
    let currentQuote = 0;
    const lastQuote = qoutes.length - 1;

    const display = (quote) => {
      qouteUI.innerHTML = `<div class="quote">
        <p class="quote-text">${quote.text}</p>
        <p class="quote-author">${qoute.author}</p>
      </div>`
    }

    const slide = (_) => {
      display(qoutes[currentQuote]);
      if(currentQuote < lastQuote) {
        currentQuote++;
      } else {
        currentQuote = 0;
      }
      setTimeout("slide()", time);
    }

    window.onload = slide
If you look at the code above, you will see that we use something that looks like the code we wrote for the next( ) method in the previous application. Instead of stopping the movement after we get to the end of the quote, we set the depth back to 0 which means it will start from the beginning again. We use a single display but we change its content every two seconds.
Image slider/carousel.
In this part, we will create a simple slideshow with next, previous and pagination as in the image below:

Let's start by adding HTML code:
<div class="carousel-container">
    <div class="item fade">
        <div class="image">
            <img src="assets/images/danial-igdery-FCHlYvR5gJI-unsplash.jpg" id="slider_image">
        </div>
        <div class="slide-number"> 1 / 3 </div>
        <div class="text">
           <h1 class="title">
               <i class="bi bi-caret-right"></i>
               <span class="slide-title">This is the title</span>
           </h1>
           <p><i class="bi bi-info-circle"></i>
              <span class="slide-description">
                 Here is the content that describes this image and it works perfectly
              </span>
            </p>
       </div>
   </div>
   <div class="prev" onclick="previous(-1)">
       <i class="bi bi-caret-left-fill"></i>
   </div>
   <div class="next" onclick="next(1)">
       <i class="bi bi-caret-right-fill"></i>
   </div>
</div>

//pagination dots
<div class="dots"></div>
Now, let's add JavaScript to the application. We will start by adding an array of images to the slides.
const images = [
    { path: 'assets/images/Digital-Marketing.jpg', title: 'good image', description: 'good image'},
    { path: 'assets/images/danial-igdery-FCHlYvR5gJI-unsplash.jpg', title: 'good title', description: 'goood description2'},
    { path: 'assets/images/icons8-team-OLzlXZm_mOw-unsplash.jpg', title: 'title3', description: 'description3'},
    {path:'assets/images/istockphoto-1136972579-612x612.jpg', title: 'title4', description: 'description4'},
]
To display images, titles, descriptions and the paginating dots in the browser, we need the code below to do it:
let currentImageIndex = 0;
const lastImageIndex = images.length - 1;
0
const display = (currentImageIndex) => {
    //display slide image
    const sliderImage = document.getElementById('slider_image');
    sliderImage.src = images[currentImageIndex].path;

    //display slide title
   const slideTitle = document.querySelector('.slide-title');
   slideTitle.innerHTML = images[currentImageIndex].title;

   //display slide description
   const slideDescription = document.querySelector('.slide-description');
   slideDescription.innerHTML = images[currentImageIndex].description;

   //create slide number
   makeSlideNumber(currentImageIndex, lastImageIndex);
}

display(currentImageIndex);// Display the first image in the array

paginate(images);// make dots as paginators
The code above somehow looks like what we use in the counter app. The display( ) method here is a bit different because we have to display an image, a title and a description, unlike in the counter app where we only display a number.
The image display uses a single display pattern and the "dots" use multiple displays pattern.
const next = (increment) => {
    if(currentImageIndex < lastImageIndex) {
        currentImageIndex = currentImageIndex + increment;
    }
    display(currentImageIndex);
}

const previous = (decrement) => {
    if(currentImageIndex > 0 ) {
        currentImageIndex = currentImageIndex + decrement;
    }
    display(currentImageIndex);
}

//This uses multiple display
function paginate (images) {
    const dotsFromDOM = document.querySelector('.dots');
    const dots = images.map( (image, index) => {
        const defaultActiveDot = index === 0 ? 'active' : '';// make the first item active.
        return `<div class="dot ${defaultActiveDot}" id="dot${index}" onclick="display(${index})"></div>`;
    });
    dotsFromDOM.innerHTML = dots.join(' ');

    dotsFromDOM.addEventListener('click', (event) => {
        makeActive(event.target);
    })
}
The code above contains next, previous and paginate which we have explained initially. The point I am making here is that we compose the components we have created to make this project. Then let's talk about makeActive( ) and makeSlideNumber( ):
function makeActive(element){
    const activeElement = document.querySelector('.active');
    activeElement.classList.remove('active');

    element.classList.add('active');
}

function makeSlideNumber (currentImageIndex, lastImageIndex) {
    const slideNumber = `${currentImageIndex + 1} / ${lastImageIndex + 1}`;

    const slideNumberUI = document.querySelector('.slide-number');
    slideNumberUI.innerHTML = slideNumber;
}
We didn't discuss these two concepts earlier; there are still more concepts we can't cover in this write-up anyway but let's explain these two concepts. makeActive( ) is used to make an element active. It sets the class that makes an element active. This was also used in the image gallery project. It is used anywhere you want to make an element active, disabled, appeared or disappeared based on an action.
It is basically used to set the state of an element. Understanding it means setting states will now be relatively easier for you. The concept is used to create anything that toggles such as a menu.
makeSlideNumber( ) creates the position of the current slide against the total number of slides. It is like a page number.
That is it. You can check the application demo here and its source code here.
Image gallery with a navigator
In this part, we will create an image gallery with pagination as a navigator as in the image below. We also simulate up and down movements in this project.

Let's start by adding HTML code:
<div class="image-container"></div>
<div class="pagination"></div>
<audio id="audio" src="/beep-02.mp3" autoplay="false" ></audio>
<audio id="audio2" src="/beep-08b.mp3" autoplay="false" ></audio>
Then we need to add some JavaScript code to bring its functionalities to life.
const image_gallery = document.querySelector(".container")
const image_container = document.querySelector(".pagination")
const loading = '<h1 class="loader">Loading...</h1>';

const images = [
    {path:"images/first-image.jpeg", alt: "image"},
    {path:"images/third-image.jpg", alt: "image"},
    {path:"images/second-image.jpg", alt: "image"},
    {path:"images/fouth-image.png", alt: "image"},
    {path:"images/4 cardinal points.jpg", alt: "image"}
];

let currentImageIndex = 0;
let lastSlide = 0;

const display = (index) => {
  const image = images[index];
  image_gallery.innerHTML = `<img src="${image.path}" class="animate-entrance image" style="height:16rem;" alt="${image.alt}">`;
}
Oh, ain't you tired of this repetition? This part looks like we're just copying, pasting and editing the display part of the previous explanations, isn't it?
const paginate = (images) => {
    image_container.innerHTML = images.map((image, index) => `<img src="${image.path}" id="${index}" alt="${image.alt}" class="image__item ${index === 0?'active':''}" onclick="display(${index})" />`).join(" ");

    image_container.addEventListener('click', (event) => {
        makeActive(event.target.id);
    })
}

display(currentImageIndex); //display an image.

paginate(images); // create a list of images as navigators.
The paginate( ) function creates a list of images that can be used as navigators just like the dots in the previous project. Instead of using dots, we use images. Isn't it a kind of repetition but with different content? Well, I think it is.
Next and previous:
const next = (increment) => {
  if(currentImageIndex < lastSlide) {
      currentImageIndex = currentImageIndex + increament;
  }
  display(currentImageIndex);
  makeActive(currentImageIndex)
}

const previous = (decrement) => {
  if( currentImageIndex > 0 ) {
      currentImageIndex += decrement;
  }
  display(currentImageIndex);
  makeActive(currentImageIndex)
}
The code above creates the next and previous functions for the project. Yet another repetition!
Up and Down functions:
const isPositive = number => Math.sign(number) === 1

const up = baseIndex => {
  const decrement = currentImageIndex + baseIndex;
  if(decrement < 0 && isPositive(baseIndex)){
    return "A negative number is required or you have got to the first item";
  }
  previous(baseIndex);
}

const down = baseIndex => {
  const increment = baseIndex + currentImageIndex;
  if(increment > lastSlide && isPositive(baseIndex)){
    return "A positive number is required or you have got to the last item";
  }
  next(baseIndex);
}
This is a discovery. We could simulate upward and downward movements in the browser by setting baseIndex for the items in a component and baseIndex is the number of items displayed in a row. In this application, two items are displayed per row in the pagination. So, to create an upward and downward movement for the pagination component, we use the baseIndex with previous( ) and next( ) respectively.
Instead of passing -1 and 1 to previous and next respectively, we pass base index to them. up takes a negative baseIndex and down takes a positive baseIndex.
make active and play a sound:
function playSound(number) {
  var sound = document.getElementById(`audio${number}`);
  sound.play();
}

const makeActive = (id) => {
  const currentActiveImage = document.querySelector('.active');
  currentActiveImage.classList.remove('active');

  const activeImage = document.getElementById(id)
  activeImage.classList.add('active');
}
We have added two audio files to our HTML code and we only use playSound( ) to trigger the sound based on the number of sounds provided. makeActive( ) is to make the current item active by setting its border to red. If you remember, makeActive( ) is another repetition, isn't it? OMG!
Identify a key event and assign an action to it:
const changeImageWithKeys = event => {

  if(event.keyCode === 37) {
    previous(-1)
    playSound('');

  }
  if(event.keyCode === 38) {
    up(-2);
    playSound(2);
  }
  if(event.keyCode === 39) {
    next(1);
    playSound('');

  }
  if(event.keyCode === 40) {
    down(2)
    playSound(2);

  }
}

// Event listeners
document.addEventListener('keydown', changeImageWithKeys)
This part is used to make sure the pagination is navigable with the direction keys on the keyboard. Aside from the event, we only use the movements in an array. We set an event listener to listen to key press, so the changeImageWithKeys( ) function will be called whenever a key is pressed. We did it. Isn't that cool? Yeah! I think it is.
In short, all we learn from building the projects are very useful in building a lot of other projects or components such as testimonial slides, posts, tweets, articles, quiz apps and many more. Understanding the ideas shared in this article would help you to be more effective in building frontend projects especially if you're a beginner.
Conclusion.
Most of the projects we build have similar patterns. Posts, articles, messages and many more make use of similar patterns or concepts. Clearly establishing these patterns and concepts will help fellow developers, especially beginners, learn and grow fast.
Learning to code can be pretty interesting if we study the fundamental patterns in the applications we build because beginners can use the patterns to build some projects and also use them as a foundation to build their thinking process until they can form their opinions to challenge everything. Every developer struggles with how to think to build projects and this idea is meant to ease the struggle. Go now and build amazing projects.
Personal note
If you like this write-up and you would like to support my projects by any means possible, you can reach me on Twitter as Codingnninja